So here's a look at how I went about c
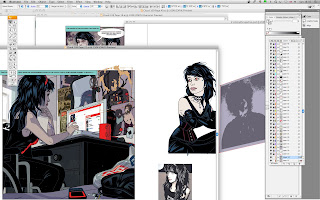
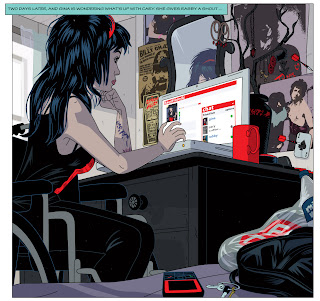 reating some of the elements that are currently hanging on the wall of the room where Gina spends much of her time when she's accessing the cyberworld of Cloud 109. The idea is to make the real world elements as convincing as possible when the three lead characters, Cary, Gina and Rabby appear as themselves rather than their fancy and various avatars. Gina at this stage of the story is trying to contact Cary and Rabby, but Cary's phone is off - familiar scenario, but she's going to try and access him via 'facefriendz'. I needed to make her environment a reflection of her character, out of all the three characters Gina is undoubtedly the coolest and savviest, wheelchair or not. Her room and most importantly her dresser, where she has her Ibook propped open has to hint at a life beyond what the reader may see in the pages we present to them. All characters to have any kind of conviction in a work of fiction have to contribute themselves to the plot but nevertheless exist independently of what the reader encounters and not act as mere cyphers, this is every bit as important in the artwork as in the writing. You should really care about your characters and obsess just a little bit about their lives beyond what the reader gets to see and ask yourself what makes them tick.
Part of what makes Gina tick is her undoubted Goth chic, her tastes in music, fashion and the the kind of rock n' roll iconography that would appeal to such a girl. Not beyond the bounds of possibility that she'd be into The New York Dolls and Mr Johnny Thunders, who comic afficionados may know, took his moniker from the character "Johnny Thunder" a western comic drawn by the phenomenally talented Alex Toth and written by Robert Kanigher (who you'll doubtless recall as editor from hell of D.C's war comics).
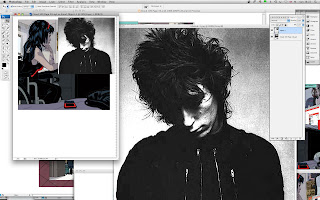
So a Johnny Thunders poster adorning the wall behind that rather nice mirror would be in order. The image of Thunders as rock n roll martyr being the one to go with as opposed to one of the one's towards the end of his life when the ravages of a serious heroin addiction were all too plain to see.
So step one you snaffle up your source image and import it into Photoshop adjusting the contrast and increasing the pixel count if necessary so as to preserve as much information as possible before subjecting it to conversion from bitmap to vector later on. You can have both Illustrator and Photoshop which you will need for this exercise running concurrently via Adobe Bridge. Now you open up the image that you will be dropping your poster into. You then use the Photoshop distort tool, which is a function nigh on impossible to replicate in Illustrator - hence us using Photoshop and twiddle the thing around until you've got it working in perspective. You then drag the perspectified Johnny into a new image in Photoshop and you save it.
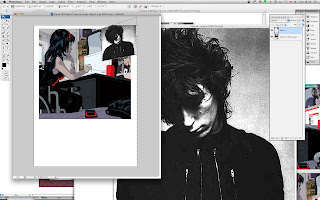
Right now hop over to Illustrator and open up your image with Gina, dresser, wall etc and now open up the perspectified Johnny image. Select with the selection tool (top left hand side of toolbox - yup - you've got it!) and then drag down from Object and choose Live Trace - Make and Convert to Live Paint.
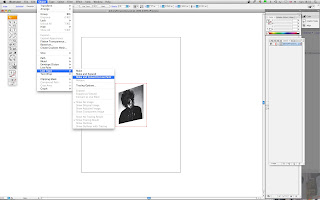
Bingo you've got Johnny all raring to go as a nifty looking vector. Keeping the image selected then go into the transparency toolbox should be on your right hand side and choose - Multiply, which will get rid of that nasty white surround which isn't going to look at all good on your artwork. You can then further adjust the transparency by fiddling with the opacity slider. When you're satisfied with the results create another layer underneath and make a base colour for the poster.
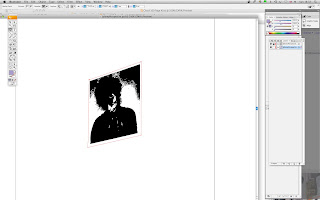
Then create a layer in the image of Gina with dresser and going back to your Johnny image, select all the layers that you have created and drag them onto your host image and carefully position just behind that mirror.
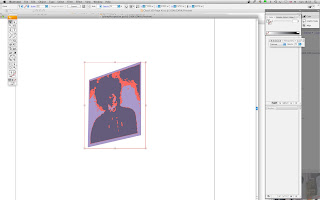
Mission accomplished and tomorrow I'll see what else we can surprise you with.


Thanks Peter, most helpful from time to time I like to include other elements in my strips, I had plans for a whole host of fake ad's and comic strips to be included in "Last Night..." but I lack the patience and they always turn out a bit cack handed. This post will be a big help in the future.
ReplyDeleteReally the same problems that I encounter all the time James, you could literally spend hours and hours creating illustrations within illustrations to create that feel of life going on beyond the confines of your comic strip, but the internet is just such a great resource when coupled with the powerful tools available within programs such as Photoshop and Illustrator.
ReplyDeleteI love these how-to pieces, even though they might as well be alchemy lessons by Professor Snape as far as an art ignoramus like me is concerned.
ReplyDeleteI also relate very strongly to that icberg of backstory you're talking about. I totally obsess about my characters, to the extent of knowing what they eat and what they daydream about and how they spend their day. You do wonder if all that matters when so little of it is experienced directly by the reader, but it's all valuable in creating a fully-rounded person.
It's I suppose comparable to the Lee Strasbourg school of acting as practiced by someone like Daniel Day Lewis who so immerses himself in a role that he lives it off stage and off camera. When applied to creating stories it's something that will resonate with the voyeur inside all of us and it's just that fun thing of creating other worlds and really caring about your characters, which is one of the qualities that so appeals to me with what you and Leo and Nikos have done so engagingly with Jack and Estelle and the rest of the Mirabilis characters.
ReplyDeleteRoll on Friday and the next installment.
Track Mobile Number, Find Whatsapp Number, Report Lost Phone, business directory
ReplyDeleteWe can give you the details of mobile number of 22 countries of the world along with the name and home address and location of the owner. The list of countries whose mobile number details are available for you is provided below:
Australia, Bangladesh, Canada, China, Ghana, India, Indonesia, Kenya, Malaysia, Nepal, Norway, Nigeria, Philippines, Poland, Pakistan, Singapore, Saudi Arabia, South Africa, Sri Lanka, United Arab Emirates, United Kingdom, United States.
mobile number tracker
ReplyDelete