Illustrator at first come across as a horribly anal way of creating artwork, everything has to assembled by you working with a pen tool which creates vectors with weird little axis on them and the whole process to begin with can seem horribly daunting. But persevere and it all gets a lot easier and the results are just so rewarding. It has a natural elegance and crispness about it that Photoshop can never achieve and because you are working with vectors and not jiggedy jaggedy bitmaps the resulting artwork can be blown up big enough to cover the Empire State Building without any diminution in crispness.

You can really create a lot of very painterly effects with Adobe Illustrator using a combination of vector gradients and transparent layers and for today's exercise I'm going to show you how you can easily add modeling to a face without getting bogged down in the whole process.
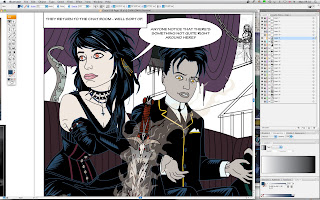
So, OK lets start with just the line drawing which I've coloured in by using the selection tool , either one at the top of the tool box on the left side of the screen will do. You'll note that I've had fun adding in some hair highlights already with a fill colour of dark blue leaving the outline blank
 , check out the bottom rectangles under the hand and magnifying glass icons in the toolbox. See there's a blue rectangle - that indicates your fill colour and see there's a box with a square cut out of it and a red diagonal - that's your outline and the red diagonal tells you it's empty.
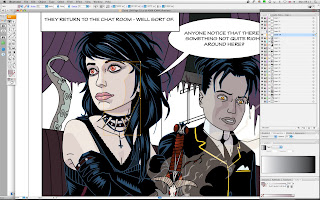
So what you do is start drawing in with your pen tool a purplish tone (least that's what I've gone for) on a new layer and here's the fun bit - in the transparency tool box on your right, having selected the purplish area (note the highlight around the area concerned) make the transparency property multiply rather than normal and hey presto you can now see through the thing. If it's too dark just take the opacity slider in the same panel and push it around until you are happy with the appearance.

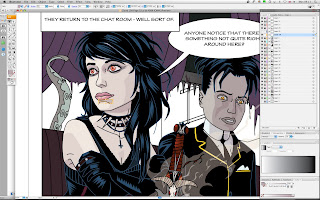
Then work around other areas of the face, using the principle of less is more, so don't get too bogged down with this. The area under the girl's lips I made slightly darker at 39% opacity as opposed to 21% opacity for the softer zones of lighting on the face, but your needs might well be different so don't be afraid to experiment.
The areas around the eyes again are even darker and a deeper purple and again don't be afraid to try out different looks to get the effect you require.
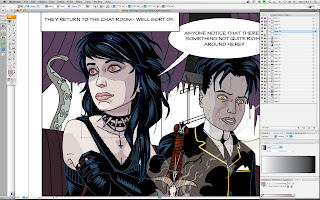
Lastly and on a different layer again, so that you can knock out the eye icon in that layer in the toolbox and check the before and after effect,
 create the effect of light hitting the lower part of the face. This in the context of this illustration is very important, it hints at props which are out of screen, in this case the rather macabre Gothy type drapes that hang in front of the screens in the cyber lounge and also concentrates the viewer's attention onto the girl's somewhat wistfull expression - hey if it's good enough for several generations of 'noire'esque' film directors it's good enough for us. So instead of dropping in light - it's already there - just add in the extra shadow over the eyes and round the nearest edge of the face, under the chin etc, etc until you have just consolidated the new area into a convincing whole.
And hey there we go a little bit of light and shade all adding to the story.
Not as daunting as it first seemed!


.jpg)


